Have you ever dreamt of crafting intricate frozen delights that effortlessly pop out of their molds, showcasing perfect shapes and dazzling details? For any home baker or seasoned pastry chef looking to venture into the world of frozen treats, silicone molds are a game-changer. These flexible, non-stick marvels simplify the process of making everything from gourmet ice cream cakes and refreshing sorbet pops to elegant semifreddos and individual frozen mousses. This guide will take you through everything you need to know to harness the full potential of silicone molds, ensuring every frozen dessert you create is a masterpiece.
Understanding Silicone Molds for Frozen Treats
|
Our Picks for the Best Baking mold in 2026
As an Amazon Associate I earn from qualifying purchases.
|
||
| Num | Product | Action |
|---|---|---|
| 1 | RFAQK 100pcs Cake Pan Sets for Baking + Cake Decorating Supplies: 3 Non-Stick Springform Pans Set (4, 7, 9 inches), Icing Tips, Cake Leveler – Multi-functional Leak-Proof CheeseCake Pan & eBook |

|
| 2 | Novery 9.5" Non-stick Cake Pan, Heavy Duty Carbon Steel Fluted Tube Round Baking Pan,Buntz Pound Cake Pan Mold,Tube Bakeware,Baking Mold for Jello,Gelatin,Chocoflan,Flan |
|
| 3 | Chicago Metallic Professional 3-Piece Round Cake Pan Set - 6, 8, and 10 Inch Nonstick Carbon Steel Baking Pans, 2 Inches Deep, for Layered Celebration Cakes and Tiered Desserts |
|
| 4 | HIWARE 9 Inch Non-stick Cheesecake Pan Springform Pan with Removable Bottom/Leakproof - Black |
|
| 5 | CAKETIME 12 Cups Silicone Muffin Pan - Nonstick Cupcake Pan 1 Pack Regular Size Silicone Mold for Baking |
|
| 6 | O’Creme Bakeable Plastic Mini Cake Pan & Jello Mold – Non-Stick Silicone Baking Pan – Reusable Mold For Baking, Desserts and More – 25 QTY Pack |
|
| 7 | Vinino Silicone Mini Loaf Pans with Metal Reinforced Frame-2 Pack, Non-stick Silicone Bread Pan for Baking 8-Cavity, Tiny Banana Bread Set, Dishwasher Safe Brownie Pan-Cream |
|
| 8 | Palksky (2 Pcs) 8 Cavity Rectangle Granola Bar Silicone Mold/Nutrition/Cereal Bar Molds Energy Bar Maker for Chocolate Truffles Ganache Bread Brownie Cornbread Cheesecake Pudding Butter Mould |
|
| 9 | Amazon Basics Nonstick Muffin Pan, Set of 2, Sturdy, Oven Safe, Bakes Evenly, Easy to Clean, 12 Cups, Gray, 13.9x10.55x1.22" |
|
| 10 | Amazon Basics Rectangular Nonstick Bread Loaf Pan for Baking Meatloaf with Even Heat Distribution, 9.5 x 5 Inch, Gray, Set of 2 |
|
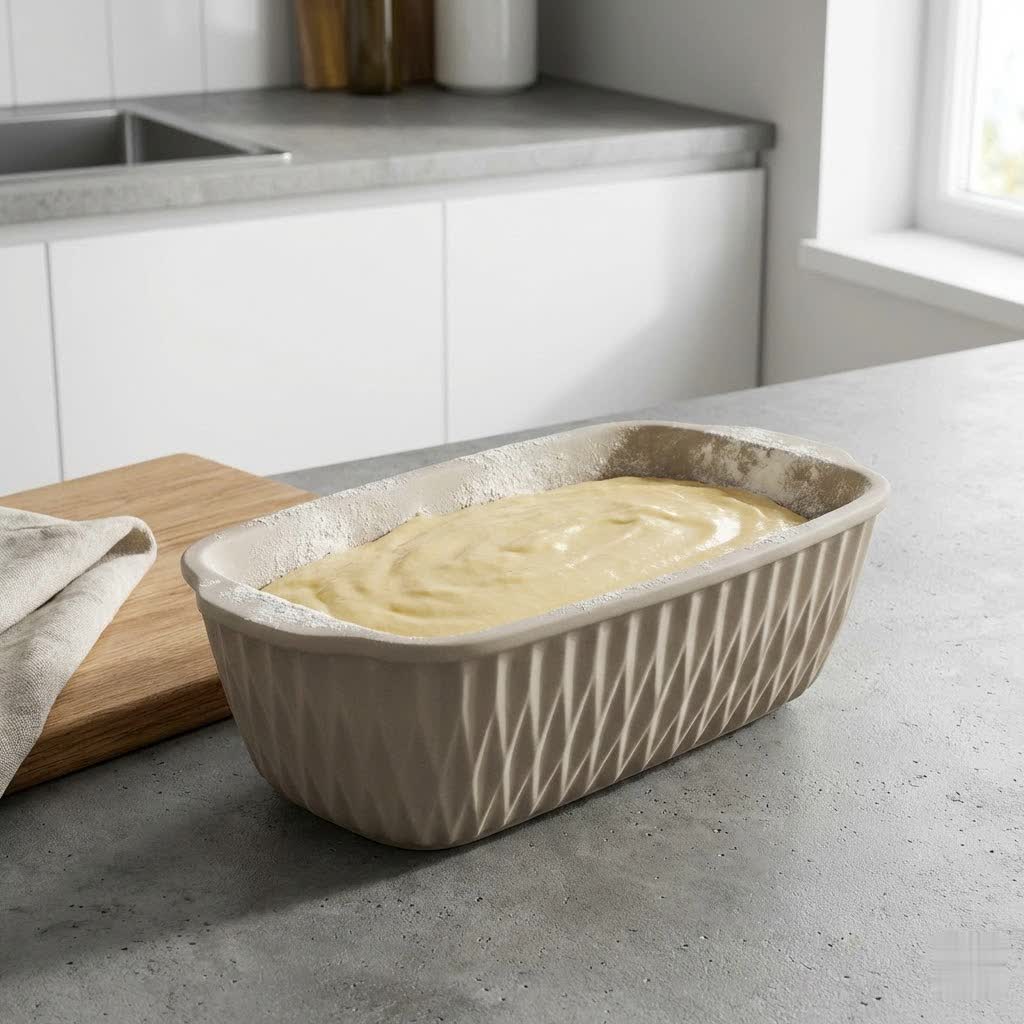
Silicone molds, made from food-grade silicone, are renowned for their exceptional flexibility and non-stick properties. These characteristics make them ideally suited for creating frozen desserts, where easy release is paramount to preserving delicate shapes and designs. Their ability to withstand extreme temperatures, from deep freezing to high heat baking, offers remarkable versatility in the kitchen.
The primary advantages of using silicone molds for frozen desserts include their natural non-stick surface, which often negates the need for greasing, and their incredible flexibility. This pliability allows you to simply push or peel the mold away from the frozen treat, minimizing breakage and waste. Silicone is also highly durable, reusable, and easy to clean, making it a sustainable choice for your kitchen. Furthermore, quality silicone molds are freezer-safe, allowing them to go directly into sub-zero temperatures without damage, and they don’t absorb flavors or odors from your food.
However, silicone molds do have a few considerations. Their very flexibility, while an advantage for demolding, can be a drawback during transport to the freezer. Without proper support, a filled mold might wobble, spill, or deform. Over time, constant expansion and contraction from freezing and thawing can, in rare cases, lead to slight deformation or tearing in lower-quality molds. Some users might also find that silicone molds can retain greasy residues if not cleaned thoroughly, and their initial cost can be slightly higher than traditional plastic alternatives.
Choosing the Right Silicone Mold for Frozen Desserts
Selecting the appropriate silicone mold is crucial for achieving the best results with your frozen desserts. The market offers a vast array of shapes and sizes, but focusing on a few key characteristics will help you make an informed choice.
Material Quality: Always prioritize food-grade silicone, often referred to as “platinum silicone.” This type of silicone undergoes a specific curing process that ensures it is free from harmful fillers, is highly durable, and provides optimal thermal resistance. Inferior quality silicone might contain impurities that could leach into food or degrade over time.
Size and Shape Considerations: Consider the type and quantity of dessert you intend to make. Smaller, individual molds are perfect for popsicles, mini mousses, or chocolate bites, while larger molds are ideal for ice cream cakes or semifreddos. The complexity of the shape should also align with your experience level, as highly intricate designs might require more careful demolding. Ensure the mold’s dimensions fit comfortably within your freezer space.
Temperature Resistance: Verify that your chosen silicone mold is explicitly labeled as freezer-safe. High-quality silicone can typically withstand temperatures ranging from -40°C to 230°C (-40°F to 446°F), making them suitable for both freezing and baking. This broad temperature range ensures the mold will not crack, become brittle, or release harmful substances when exposed to extreme cold.
Ease of Cleaning and Storage: Opt for molds that are dishwasher-safe, or at least easy to clean by hand with warm, soapy water. Consider how you will store your molds. While their flexibility allows for compact storage, storing them flat or hanging them can help maintain their original shape and prevent permanent deformation over time.
Essential Steps for Using Silicone Molds in the Freezer
Using silicone molds for frozen desserts is straightforward, but a few critical steps will ensure perfect results every time.
Preparation is Key:
For the first use, and after each subsequent use, wash your silicone mold with hot water and a mild soap, then rinse thoroughly and dry completely. Unlike metal molds, silicone molds typically do not require greasing for frozen desserts due to their inherent non-stick properties. However, for certain very sticky or delicate mixtures, a light spray of neutral cooking oil can provide extra assurance. For professional results, some chefs pre-chill their silicone molds in a blast chiller or freezer for about 20 minutes before filling, which can help reduce overall processing times.
Careful Filling:
When filling your silicone molds, pour your mixture carefully to avoid overfilling. Remember that liquids expand as they freeze, so leaving a small gap (about 1-2 cm) below the rim of each cavity is essential to prevent overflow and deformation of the mold. To maintain stability and prevent spills, especially with larger or more flexible molds, always place the filled silicone mold on a rigid surface, such as a baking tray, cutting board, or wire rack, before transferring it to the freezer. This support is crucial for easy transport and to ensure your desserts freeze with their intended shape.
Optimal Freezing:
Once filled and placed on a rigid support, transfer the mold to your freezer. Position it on a flat surface to allow the dessert to freeze evenly. To prevent frost from forming on the surface of your frozen creations and to shield them from absorbing any unwanted odors from the freezer, cover the mold loosely with plastic wrap, a suitable lid, or a freezer bag. Freezing times will vary depending on the size of your mold and the specific ingredients of your dessert, but typically range from 4 to 6 hours, or until the dessert is completely hardened.
Expert Tips for Effortless Demolding
The flexibility of silicone molds truly shines during the demolding process, but a few techniques can make it even smoother and ensure your frozen desserts retain their perfect form.
When your dessert is thoroughly frozen, remove the mold from the freezer. Instead of trying to force it out immediately, allow the mold to rest at room temperature for a few moments, perhaps 30 seconds to a minute. This brief pause allows the outermost layer of the frozen dessert to slightly warm and separate from the silicone, making release easier.
The most common and effective demolding technique involves gently pushing from the bottom of each cavity while simultaneously peeling the silicone away from the edges, much like “peeling a banana.” Work your way around the edges, applying light, even pressure until the dessert releases. For particularly stubborn creations, or those with intricate details, a quick dip of the bottom of the mold in warm water for just a few seconds can provide the necessary release without thawing the dessert itself. The key is to be gentle and patient, allowing the mold’s natural flexibility to do most of the work. Ensure your dessert is fully frozen and firm before attempting to demold; a partially frozen dessert will be too soft and prone to breaking.
Maintaining and Storing Your Silicone Molds
Proper care and maintenance will significantly extend the lifespan of your silicone molds and ensure they remain hygienic and odor-free for countless batches of frozen treats.
Cleaning: After each use, clean your silicone molds promptly. They are generally dishwasher-safe, but hand washing with hot water and a mild dish soap is also highly effective. Focus on removing any residues, especially if you’ve used fatty ingredients, as silicone can sometimes retain greasy films. If you notice any stubborn odors, try soaking the mold in a solution of warm water and white vinegar (1:1 ratio) for an hour, then washing as usual.
Drying: Thoroughly dry your silicone molds after washing to prevent water spots and inhibit bacterial growth. You can air dry them, use a clean cloth, or even place them in a low-temperature oven for a few minutes.
Storage: To prevent deformation and maintain their original shape, store your silicone molds flat or hang them. Avoid cramming them into tight spaces or placing heavy objects on top, as this can cause permanent creasing or warping over time. Keeping them in a clean, dry area will also help prevent any residual freezer odors from being absorbed into the silicone, ensuring your next dessert tastes as intended.
Top Tips for Perfect Frozen Desserts
Elevate your frozen dessert game with these expert tips, ensuring delicious and visually stunning results every time you use silicone molds.
Consider incorporating layers and diverse fillings to add complexity and texture to your frozen creations. For instance, lining your mold with a thin layer of melted couverture chocolate before adding your semifreddo mix can create a beautiful, defined shell. Similarly, alternating layers of ice cream with sponge cake, meringues, or crunchy biscuit crumbs can yield delightful contrasts.
The consistency of your ingredients is vital for even freezing and a smooth texture. Ensure liquids are not too thick or too watery; blend fruit purees for smoothness, and whisk dairy or yogurt bases thoroughly to avoid air bubbles. Leaving a small air gap at the top of the mold is essential, as water-based ingredients expand when frozen. This prevents overflow and ensures your dessert retains its intended shape.
Don’t limit yourself to just one type of frozen delight. Silicone molds are incredibly versatile, perfect for crafting a wide array of treats, from vibrant fruit popsicles and creamy ice cream cakes to elegant individual frozen mousses and sophisticated semifreddos. Experiment with different recipes and ingredients, such as fresh berries, yogurt, or even small chunks of cake, to discover new favorites and unleash your creativity.
Buying Guide
Choosing the ideal silicone mold for your frozen dessert adventures can feel overwhelming with so many options available. Follow this simple buying guide to make an informed decision:
- Identify your dessert needs: Before purchasing, consider what types of frozen desserts you envision making. Are you aiming for individual popsicles, a large ice cream cake, or intricate semifreddo portions? This will guide your choice in mold size and shape.
- Prioritize food-grade silicone: Always look for molds explicitly labeled as “food-grade silicone” or “platinum silicone.” This guarantees the material is safe for food contact across extreme temperatures and free from harmful chemicals.
- Check the temperature range: Ensure the mold’s specifications confirm it is freezer-safe, ideally with a wide temperature tolerance that can handle typical freezer temperatures without becoming brittle or damaged.
- Consider mold stability: While silicone is flexible, a good mold should offer enough structural integrity when full. For highly flexible molds, plan to use a rigid baking sheet or tray underneath for support during filling and freezing to prevent spills and maintain shape.
- Read reviews and brand reputation: Look for molds from reputable brands with positive reviews, particularly focusing on comments about ease of use, durability, and how well they perform for frozen applications.
Conclusion
Silicone molds are indispensable tools for anyone passionate about creating beautiful and delicious frozen desserts. Their non-stick properties, remarkable flexibility, and temperature resistance make them a joy to work with, simplifying everything from preparation to demolding. By selecting quality molds, understanding proper filling and freezing techniques, and mastering effortless demolding, you can unlock a world of culinary creativity. With these insights, you’re now equipped to experiment with ice cream cakes, refreshing popsicles, and elegant semifreddos, transforming simple ingredients into stunning frozen delights. What frozen masterpiece will you create first with your newfound silicone mold expertise?
Frequently Asked Questions
Are silicone molds safe for the freezer?
Yes, high-quality food-grade silicone molds are perfectly safe for use in the freezer. They are designed to withstand extreme cold temperatures, typically down to -40°C (-40°F), without becoming brittle or releasing any harmful substances, making them ideal for all types of frozen desserts.
Do I need to grease silicone molds for frozen desserts?
Generally, no. Silicone molds possess natural non-stick properties that prevent frozen desserts from sticking, making greasing unnecessary. For extra assurance with very delicate or sticky mixtures, a very light spray of neutral cooking oil can be used, but it is often not required.
How do I prevent my frozen dessert from sticking to the silicone mold?
Ensure your dessert is fully frozen and firm before attempting to demold. Allowing the mold to rest for a minute at room temperature, or briefly dipping the bottom in warm water, can help release the dessert. Then, gently push from the bottom while peeling the mold away.
How long does it take for desserts to freeze in silicone molds?
Freezing times vary depending on the size of the mold and the specific ingredients of your dessert. Smaller items like popsicles might take 4-6 hours, while larger ice cream cakes or semifreddos could require 6-8 hours or even overnight to become completely firm.
Can I put silicone molds directly from the oven into the freezer?
Yes, high-quality food-grade silicone molds are designed to handle extreme temperature changes and can typically go directly from the oven (within their safe temperature range) into the freezer without damage. This thermal shock resistance is one of their key advantages.